From Sap to Syrup: A Sweet Adventure in Maple Sugaring
As the days grow longer and the winter chill starts to lose its grip, a magical transformation takes place within the sugar maple trees. Their sweet sap, stored throughout the cold months, begins to rise, ready to be tapped and transformed into the golden treasure we know and love: maple syrup.
While commercially produced maple syrup is readily available, there’s something truly special about making our own. It’s a chance to connect with nature, witness the science of sap evaporation firsthand, and savor the rich flavors—all while creating a delicious homemade treat.
But before we get our hands sticky, let’s understand the basics
- Season and Trees: Maple sugaring typically happens in late winter/early spring when temperatures fluctuate between freezing nights and thawing days. Sugar maples are the star players, but other species like red maple can also be used.
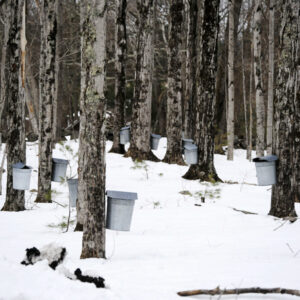
- The Tap: A small hole is drilled into the tree, and a spile (metal tap) is inserted to collect the flowing sap. Remember, tapping responsibly is crucial; consult local guidelines to ensure sustainable practices.
- The Boil: The collected sap is then boiled down, concentrating the sugars and evaporating the water. This can be done over an open fire in a large pot, using a specialized evaporator, or even on your stovetop (though be prepared for a long simmer!).
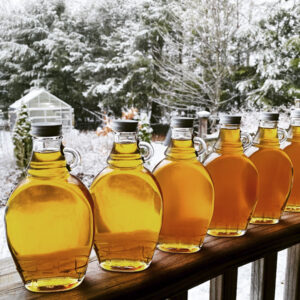
- Sweet Success: Once the sap reaches a specific density and syrup consistency, it’s filtered and bottled. The final product boasts a range of flavors depending on the boiling time and specific tree source, offering a unique flavor.
Ready to embark on your own maple sugaring adventure? Here are some key steps:
- Gather your supplies: You’ll need taps, buckets, filters, a thermometer, and a large pot or evaporator. Safety first! Wear proper gear and follow best practices for tapping responsibly.
- Find your sugar source: Connect with local sugarbush owners or tap your own trees (with permission and proper knowledge).
- Tap and collect: During the sugaring season, monitor the weather and collect sap regularly. Keep it clean and cool to prevent spoilage.
- Boiling down: Patience is key! Simmer the sap slowly, watching the temperature and consistency closely. It can take hours to reach the desired syrup density.
- Once your syrup is ready, filter it to remove any impurities and bottle it up in sterilized containers. Label with the date and enjoy!
Making your own maple syrup is an experience beyond just creating a delicious condiment. It’s a journey into the heart of the maple forest, a celebration of seasonal change, and a sweet reward for your efforts. So, grab your bucket, tap into the magic, and discover the world of homemade maple syrup!
Bonus Tip: Share your sugaring experience with friends and family! Host a maple syrup tasting, use your homemade syrup in baking, or simply savor the unique flavor on pancakes or waffles. It’s a taste of nature’s bounty to be shared and enjoyed.
Remember, this is just a starting point. Be sure to research and adapt the process to your specific resources and environment. Happy sugaring!
Check out our adventures in maple sugaring!