Introduction To Water Bath Cannning
Knowing how to preserve the food you can obtain when it is plentiful, in season or just plain affordable is just one step in our journey to be self-reliant.
There are many methods of preserving foods including:
- Smoking
- Salting/Pickling
- Fermenting
- Water Bath Canning
- Pressure Canning
- Dry Canning
- Freeze Drying
- Dehydrating
So, why should you bother canning your own foods? For many people, home canning gives them control of the ingredients in their foods, which has become a concern for many as the number of preservatives and emulsifiers added become harder to track.
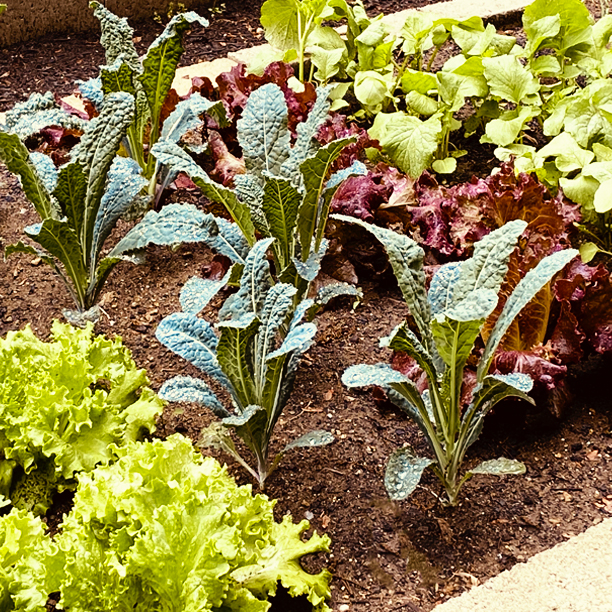
Another reason is many people have turned to gardening, on a small or large scale, over the last few years and have discovered the amazing difference in the taste of homegrown compared to store bought. Being able to take your excess garden vegetables, fruits or herbs and preserve them to enjoy off season is both money saving and time saving.
With prices on the rise and our time becoming a more precious commodity, having home canned items ready to cook and serve or add as a quick addition to a meal or snack is a great option instead of take out or junk food.
Whether you can what you grow in your garden, what you pick up fresh at a local farmer’s market, or what you can get in season or on sale at your grocery store is not the focus here. The focus is knowing what is in the food you eat and not letting things go to waste. Having food you grew and canned is a super bonus as you have the most control over how it was grown, fertilized and stored.
It’s important to remember that you should put your focus on canning what you eat! If no one in your house eats pickles, don’t can tons of pickles! Focusing on canning items you eat and use to prepare your meals is the best use of your time, money and energy. If you know your family loves pasta with red sauce and salsa, you may want to plan your garden or farmer’s market buys on the ingredients you will use to make homemade sauce or salsa. Whatever you use weekly in your meals should be your first focus when you start your pantry and start your canning journey.
I get questions regularly about the cost involved in home canning and “Isn’t it just easier to buy it canned at the store?” To be honest, sometimes the answer to that question is Yes! There are things we like to eat that may not grow well in our area or be occasional treats that it makes more sense to just buy and put on the self.
We have all watched prices soar for the everyday foods we eat and have experienced to some degree the increase in our weekly or monthly grocery bills. Items you can today, even if you purchase the ingredients from someone else, are going to have the bonus of being cheaper than we can expect them to be a year or more from now.
History of Canning
Food preservation goes back thousands of years. Jars of honey and pots of rice have been found in Egyptian tombs. The modern canning process dates back to the late 18th century and Emperor Napoleon Bonaparte’s armies. Nicholas Appert came up with the idea of bottling foods. It took 15 years of trial and error for him to determine that if he heated the foods sufficiently and sealed them in an airtight container the food did not spoil. That process was then worked on by Englishman, Peter Durand who developed a way to seal food into unbreakable tin containers. This all led up to some of the first commercial canning factories being set up in the United States in 1812 and in England in 1813.
Canning Today
The basics of canning have not really changed that much over the years. You need heat sufficient to destroy the dangerous micro-organisms when you seal them in an air-tight container. The amount of time needed to reach the necessary temperatures of 240-250 degrees Fahrenheit (116-121 Celsius) varies depending on the food you are canning. The acidity, density and ability to transfer heat varies from food to food and determines the current guidelines for canning method and time.
*The US Food and Drug Administration controls the guidelines use here in the United States and is the point of reference used in most canning books you will buy commercially.
Canning Methods
When picking the method of canning you’ll use to preserve your food, your goal is to prevent botulism. You are going to determine this based on the acidity of the food. Low PH or high acid foods like strawberries, apples, cherries and most tomatoes are good candidates for water bath canning. You will see some water bath canning instructions include lemon juice, citric acid or vinegar to lower the PH level of foods that you are water bath canning. High PH or Low-acid foods will be recommended to pressure can; such as red meats, seafood, poultry, milk and all fresh vegetables (except most tomatoes).
The Science Behind Water Bath Canning
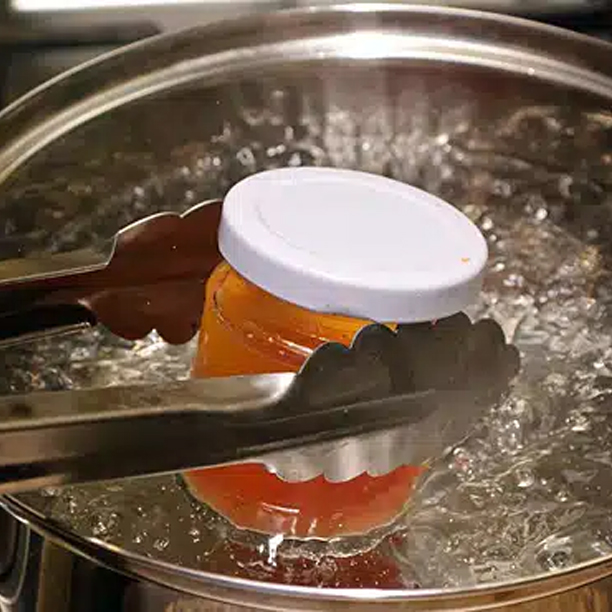 Adding jars, lids and even canning tools to boiling water for 5 or more minutes will sanitize them from yeasts, molds and bacteria. The reason we only water bath acidic foods and even add more acid in the form of vinegar, citric acid and lemon juice is to kill pathogens that don’t die in boiling water. NOTE: some low acid foods can ONLY be canned using a pressure canner to prevent certain bacteria that cause the toxin Botulism.
The temperature inside the jars of a water bath will never exceed 212 F because that’s the maximum temperature that the boiling water around the jars can reach. Pressure canning holds the jars in a steam bath of around 240 F for the amount of time prescribed for the food being canned.
Pre-heating the jars and the food to be canned not only sterilizes it, it also reduces the “shock” when adding them to the boiling water which helps to prevent jars from breaking and food being syphoned out. On that note; When your canning time has completed, turn the heat off and leave the jars in the canner for at least 5 minutes to slowly reduce in temperature or again the shock and rapid reduction in temperature which can cause the food to syphon out of the jars.
Oxygen causes food to degrade in appearance, flavor and nutrition. There’s not only air in the headspace of the jar, there’s air inside the food you are canning and trapped between each piece of food. That is why it’s important to “de-bubble” or knock the air out of the food in your jars. We want to drive all this air out of the storage container to avoid spoilage and ensure a long, quality shelf life for the food product being stored.
Temperatures for Food Preservation
| Temperature(s) | Effect |
| 240 to 250°F | Canning temperatures for low acid vegetables, meat, and poultry in a pressure canner. |
| 212°F | Temperature water boils at sea level. Canning temperature for acid fruits, tomatoes, pickles, and jellied products in a boiling-water canner. |
| 180 to 250°F | Canning temperatures are used to destroy most bacteria, yeasts, and molds in acid foods. Time required to kill these decreases as temperatures increase. |
| 140 to 165°F | Warming temperatures prevent growth, but may allow survival of some microorganisms. |
| 40 to 140°F | DANGER ZONE. Temperatures between 40°F – 140°F allow rapid growth of bacteria, yeast, and molds. |
| 95°F | Maximum storage temperature for canned foods. |
| 50 to 70°F | Best storage temperatures for canned and dried foods. |
| 32°F | Temperature water freezes. |
| 32 to 40°F | Cold temperatures permit slow growth of some bacteria, yeasts, and molds. |
| -10 to 32°F | Freezing temperatures stop growth of microorganisms, but may allow some to survive. |
| 0 to -10°F | Best storage temperatures for frozen foods. |
In our opinion, one of the most important rules when water bath canning is always referencing your recipe/book when you are canning anything. Double check your proper canning method, canning time and proper head space for your product in your jars. There are so many variants among the different methods and foods that it’s best to be certain of the process instead of wasting food or getting sick.
If you are following a book such as the Ball Complete Gook of Home Preserving each recipe will tell you the proper canning method, the time you need to can each item based on the size of the jar and the proper head space. (Head space is the amount of space left in the jar from the top of the food to the top lip of the jar)
There are very thorough sections in these books as well that go over which foods require each type of canning, whether it be Water Bath or Pressure Canning. It is very important that you use the proper method to ensure your food is safely and appropriately preserved. While jams and jellies and many fruits can be water bath canned, items such as meats and beans are recommended to pressure can. Just to reiterate, using the wrong method or the wrong length of time may leave you with food that will need to be thrown away and no one has the time or money for that in today’s world.
Water Bath Canning Supplies
We are going to start the list of supplies for water bath canning with the standard items and will cover some optional supplies you can add to or substitute for what we have listed.
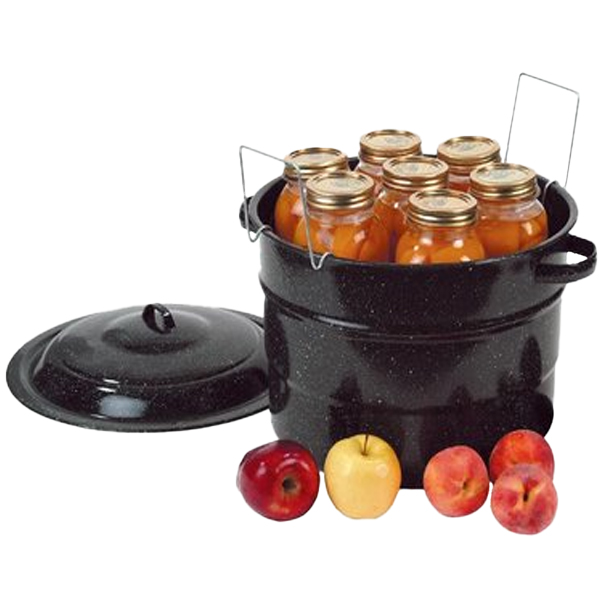 Water Bath Canner Pot – We love our Graniteware Canner which you can purchase with or without the lift out rack. You can also use any deep stock pot with a spacer in the bottom to keep the jars from touching the bottom of the pan. The important thing with whatever type of pot you use is that your jars do not touch the bottom of the pan (prevents the jars from cracking) and that you have enough room over the jars to have a minimum of one (1) inch of water covering the tops of the jars when they are being water bath canned. There are many option to use if you don’t have the lift our rack for your canning pot. You can purchase rubber fold out spacers, purchase specialized canner racks or even use canning rings tied together in the bottom of the pot.
Jars, Rings and Lids – The great thing about glass jars is they can be used, washed, sterilized and reused year after year for your food preservation. We do suggest sticking with the well-known brands associated with canning such as Ball, Kerr, Atlas, Mason, etc. Jars bought at discount stores like the Dollar Store that look like canning jars may not be tempered to withstand the heat applied during the canning process. If you pick up a flat of jars at a yard sale or second hand store, we always recommend carefully checking for cracks, chips out of the top of the jar rim, and replacing any lids that may come with them as you don’t know how they have been stored or used. Jar rings are also reusable but if you score a great deal on some second hand jars with no rings, don’t worry! You can pick up boxes of new rings and lids at most of your stores that carry canning supplies. The lids, however, are not listed as a reusable item as they were generations ago. Today’s lids have a thin rubber coating around the rim that does not maintain a good consistency for repeated use. For your lids, we also suggest staying away from no-name brand copy-cat lids as they often will not seal properly when used. We recommend that every time you buy a flat of jars that come with the rings and lids that you purchase an extra box of lids to keep on your panty shelf for the next round of canning. That being said, don’t throw away those old metal lids! We use them for our dry canning and items that are short term on the kitchen counter like pasta or oatmeal that we keep in ½ gallon jars. If you’re the crafty type, you can also use these old lids for multiple projects like garden row labels, Christmas tree ornaments and other crafts.
Thermometer – Having a reliable thermometer is important. There are recipes that will reference bringing ingredients to a specific temperature and maintaining that temperature to ensure your food is processed correctly for canning safely. We have used both traditional candy thermometers and digital thermometers over the years. I love our digital thermometer because it allows me to set an alarm when a specific temperature is met to ensure I don’t get distracted and burn what I’m working on. Whatever style you choose, always keep it clean and check it before each use to ensure it is in good condition.
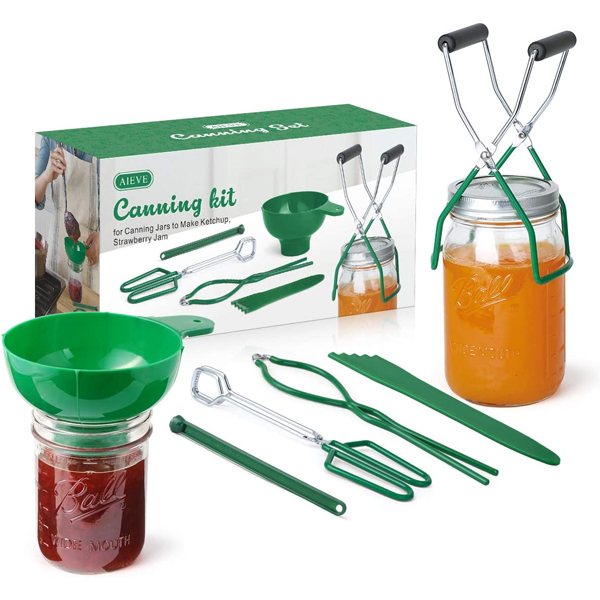 Jar Lifter, Magnetic Lid Lifter, Funnel, Headspace Measurer/De-bubbler – The greatest danger when hot water bath canning is getting burned either by steam or the hot water or jar. Purchasing a kit that includes all these items helps you to prepare your jars correctly, get them into and out of the water in your canner on onto your cooling surface more safely. Your funnel will allow you to get your food into the jars without spilling over the edges and wasting product. The de-bubbler/headspace measurer will help to make sure your jars are filled to the correct height and that you’ve removed the air bubbles out of the food in the jar. Your magnetic lid lifter will let you take your lids out of the warm water and get them on top of the jar with out you having to handle them too much; keeping them as sterile as possible. Your jar lifter is to me the most important of the tools. Using your jar lifter, you can pick up your hot, filled jar and place it into your boiling water without having your hands too close to the hot water. When your jars have finished processing, the lifter will again allow you to pick the jar up and remove it from the water to put on the counter, protecting your hands from close contact with water. How you purchase these or if you choose to use other items in place of these, I definitely recommend picking up at least the jar lifter.
Do you put a ring on it? Depending on who you talk to or what book you read, you will different opinions on if you should keep a ring on your jars after they’ve cooled and you put them on the shelf. I’m going to weigh in with my personal opinion and let you make your own decision and do your own research on this. Personally, it depends on what I’m canning and how I’m storing the item. For items that I’ve hot water bath canned, normally I do remove the rings when they go in my pantry. Why? The main reason for this is that by removing the rings, you can more easily see if the top on an item pops and breaks the seal, exposing the contents to contamination. With this said, you should be checking the items in your panty periodically whether you have rings on the jars or not. No one wants to find a jar that has popped the top, spilled onto the shelf and become an invitation which drew mice and other pests into your pantry.
That being said, I often leave rings on items I have “dry canned” but that is for another time… So whether you choose to remove or leave your rings on your jars, you should still be setting up a schedule to check your pantry items to make sure they are all still properly sealed.
Fresh foods vs Frozen
Fresh out of the garden isn’t the only food to can. You can grow your own, purchase at a farmer’s market or your local grocery and can fresh foods. If you’re like me, you always run out of time during the garden season to get everything canned or just don’t have it coming in big enough amounts to have a batch to can. This is when I may prep and freeze the fruits or veggies so when I have enough or I have the time, I can get them processed and onto my pantry shelf. The most important part here, is making sure the food is in good condition with no pests, not shriveled or wilted at the time it’s frozen and that you prepare it by washing, cutting out any bad spots and freezing it while it is in it’s best condition. A great example of what I freeze and can later are my jams or jellies. I grow strawberries, blueberries, rhubarb and other fruits that don’t all come to harvest at the same time. It’s not uncommon for me to freeze my strawberries and my rhubarb until I have enough of both to make some Strawberry-Rhubarb jam. Often I have an abundance of rhubarb left after making all my jam and that will go in the freezer to make a Victoria Sauce for canning during the winter months when I have more time. There are a lot of books on the market that will help you to know the best methods for freezing items for later use, and how to prep them for the freezer.
Storage
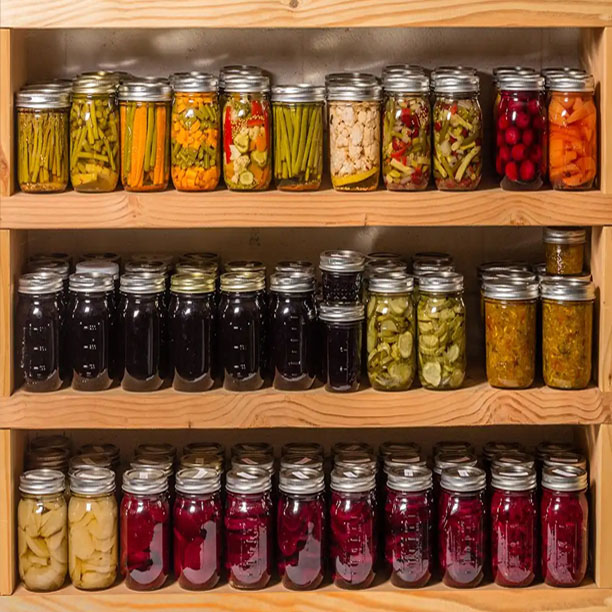 The final topic here is going to be storage of your water bath canned items. The key to keeping your food stored in the best condition for the longest time is storing them in a clean, cool, dry area. You want to find an area for your pantry that you can either control the temperature with heat and air conditioning, or a place that maintains a temperature above freezing and below 75 degrees Fahrenheit. Avoid storing your food in areas that reach above 95 degrees Fahrenheit such as near hot pipes, a furnace or stove or in an attic or a garage that can get very hot for sustained periods of time.
Storing foods in excessive heat will cause them to loose quality over a much shorter period of time and can cause them to spoil. Storing your jars in areas that are damp can cause the metal lids and rings to rust and corrode leading to broken seals and contamination or spoilage.
Accidental freezing and thawing of your jars won’t immediately cause spoilage but can cause the food to soften or if the lids unseal due to freezing and thawing then spoilage can happen.
Remember that if you have a jar on the shelf that came unsealed don’t take the chance of eating what’s in the jar, just throw the contents away. It’s not worth the contents of one jar to get sick or worse. Make sure any spoiled jars are thoroughly cleaned and sterilized and any spillage is cleaned and the area disinfected.
Thank you for spending some time with us learning about Water Bath Canning and remember if you want to see us talk about or do a video on another topic, let us know. Happy Canning!!
Thanks Marilyn and Steve – Yes the class was wonderfully fun and informative plus we got a pint of freshly made applesauce – Yum!
These follow up notes are perfect. Even though I did take notes, this write up is so thorough and complete, covering everything that you went over in the class.
Thanks again for sharing your expertise. Loved it.